Sunday, December 19, 2010

I Like Machines

I've come to realize my affinity for machines. How and why they work, why they stop working, and so on.

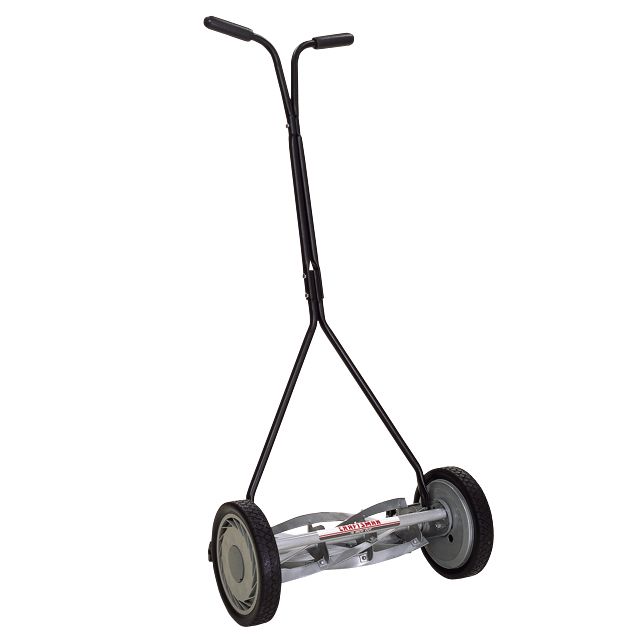
When I bought my reel mower two summers ago it was for environmental reasons and to stop wasting money on fuel for my gas mower. What I didn't know is how amazing it was to see five helical blades spin around, sheering the grass and throwing it aside like a scythe cutting wheat. Very cool.


But machines need maintenance or will otherwise stop working. Now, at the end of 2010, I think back on the on my recent machine repairs around the KSModern home. They include the following:

  • The clothes dryer stopped working. Well, it actually was the drum that wouldn't turn. But a couple of hours replacing a belt and about $20 later, it's as good as ever
  • The clothes washer also needed repair. It worked, but the agitator stopped agitating. This was a very simple fix, after spending about $5 on the agitator dogs and maybe 20 minutes on the repair
  • The dishwasher. The worst of them all. I nearly paid $500 for a new one at Sears. In fact, I bought it, but then cancelled my order when I realized I could replace the pump motor myself. It was only about $25, but wow was this a lot of back breaking work
  • A Marshall amplifier that I picked up from the trash. I replaced the input jack, soldered it to the board and it works like new
  • An Epiphone Les Paul. My bandmate had this guitar as a broken spare. Someone had left it at the bar after a gig, but never returned to pick it up. It was heavily abused and needed work, and I brought it back to life and it now plays quite well, actually
  • A Hanns-G 17" widescreen monitor for my girlfriend. This was a broken monitor from work. I found another on the eBay to use as a spare, then replaced the internal power board and LCD module to get it going
  • A Sylvania 17" widescreen LCD TV for my daughter. Not technically a repair, but its functionality was unknown and my company was going to recycle it. I salvaged it and bought an AC adapter on the eBay for $15. Works great
  • Three desktop computers from parts that my company was going to recycle. One Vista machine and two XP. All three are nice clean systems

Sunday, January 10, 2010

Nojs Alarm Clock


I've been looking for a new alarm clock for over a year, after my Oregon Scientific unit inexplicably stopped working. But it's surprising how few modern alarm clocks are out there. One that I really like is the Anything Clock by Michael Sodeau, but while at Ikea Houston earlier this month I found the Nojs. This clock must be new, because I've browsed through their clocks before and nothing really caught my eye. I mean, I like the Slabang and the Kvarta, but they're just not quite perfect for me.

But the Nojs looked great in the store, and for $12.99 it was a steal. A white clock is what I wanted, and luckily enough the Nojs is only available in white. Perfect.


Saturday, January 9, 2010

Dining Room Completion


This phase of the dining room project is where it all starts to take shape. A renovation always looks ugly before it looks better, but along the way you get the glimmer of things to come. That's what keeps me motivated to push on.

With the walls stripped bare, I hoped to prime and paint in a day or two. What I didn't count on was how my mudding and taping needed extra days to sand, reapply, and repeat. But if you don't take your time do a good job at this, the walls will look bad. Along the way I invested in a great tool: the drywall sander vacuum attachment. Purchased at Amazon.com for about $25, this tool hooks up to your shop-vac and significantly reduces the dust in the air as you sand the joint compound. I'd say as much as 90% of the dust is removed.

Of course, when I first turned on the shop-vac and began sanding the dust just blew out of the vacuum exhaust into the room. Grrr. So I wedge the shop-vac in the window to blow the dust outside.

Once complete with the sanding, I primed the walls white:


A day or two later, I applied the paint:


With the walls painted, I replaced the old black baseboard with fresh white:


Here is the room nearly complete, it just needs paint on the window:


And shown here is the finished room:


With the room looking so nice, I could not imagine bringing my old furniture back. So I started hunting for the right table and chairs. What I really wanted was the Ikea Docksta tulip-style table. But sadly there is no Ikea in KS and this table is not available online. So I looked at many alternatives from West Elm, CB2, Chiasso, etc. Nothing really caught my eye though.

Then, a few weeks later, I came across an amazing find on the craigslist! Someone listed a Docksta! Are you kidding me? The price was right, so I contacted the seller and soon picked it up. A nice couple in Kansas City (originally from Los Angeles) was selling most of their possessions and moving to Mexico. Here's how it looks:


I bought four Arne Jacobsen Series 7 reproductions for cheap from a company in San Rafael:


I've seen lots of chairs paired with the Docksta table, but I think these look the best. And here is the finished product:

Saturday, December 19, 2009

I Brought Home A Stripper

In my previous post, I told you how my simple task of removing the wood trim surrounding the opening to the dining room turned into mission creep. Mainly because the dining room needed more than just a new trim, it needed a full shave.

So I began removing the wallpaper, which fortunately went rather well, with large sections easily peeling away. See below.


When I encountered areas of wallpaper that were too stubborn to pull off easily, I heated up the area with an iron first, then gently scraped from behind. To not muck up the iron, I placed a sheet of aluminum foil between the iron and the wall.


Here's some floral wallpaper I uncovered from circa 1962. Betty Draper would've love this.


Eventually I was down to bare drywall (dry barewall?), as shown below.


With the walls ready, I moved onto the dining room window and it's black casing. I thought using white paint on a black window would just not work, so I decided to sand the window first. This proved to be challenging. Although I could sand and scrape away the paint, it was hard work. I also left many dings in the wood with all that scraping.


So I began researching paint removal products. I eventually found Peel Away 6 at Lowes to try. It's not too pricey, has no harmful fumes and is non-toxic (it may be soy-based). On the way home, I called my girlfriend and told her I was bringing home a stripper. (For some reason, she didn't think that was as funny as I did).


Strippers are a mess, I learned. So take my advice... If you bring home a stripper, have plenty of paper towels nearby. I'm just saying. Anyway, I safely removed two layers of paint.


With the walls and the window bare, I was now ready to prime and paint.


Sunday, December 6, 2009

Mission creep

Sorry it's been so long since I've posted, I've been busy with my new job. I started working for a new company in August in a contract-to-hire position, and took a permanent position in October. It's a good place to work, with lots of challenging programming projects, so I'm very happy.

But in the interim, I've tackled two big projects at the KSModern home! I'll lead off with this post about the dining room project.

I've never been happy with the transition between the living room and dining room. Originally there was a half-wall that separated the room, with spindly little posts from the top of this wall to the ceiling. And on the living room side of this half-wall... faux brick. I removed that wall around 1998, I'd say. It looked better, and opened the two rooms up to one another, but with this renovation I made a poor color choice and painted the remaining trim a mossy green. Making matters worse, I carried this color into the living room on the baseboard.

This year I'd finally grown WAY tired of staring at this green trim, and in mid August I tore it down. Here's how it looked afterward:


You can just spot a bit of the green trim leaning against on the back wall. Ugly. So the idea was to remove this trim, add corner bead, patch it up with joint compound, paint it, et voila! It's done. But that's not how it turns out in the real world. Instead, I decided to extend this little project in the dining room. By continuing the sandy color of the living room into the dining room, both rooms would be linked and flow together better. Sounds easy to me. More pics below.


Above is the view from the kitchen.

This is a detail of the south wall.

After a night or two of joint compounding (compound jointing?), I was pleased with the result.

But as you can see above, I'd already taken a step into the dining room and removed a section of wallpaper. The mission in Mission was creeping.

In the next post, I'll tell you how I brought home a stripper.

Sunday, August 23, 2009

Muji Tape Dispenser

Good design is often uncomplicated. My tape dispenser is just that. Made by MUJI in Japan, it is simple and understated, while exuding style.


MUJI focuses on providing essential items without flourish via the creative use of existing materials. They keep prices low by eliminating unnecessary packaging.

The MUJI tape dispenser is exclusive to the MOMA store at momastore.org for the simple price of $2.00.


Saturday, August 22, 2009

Textured Ceiling Removal

I've never liked the textured ceilings in my 1950's house. But scraping and removing the popcorn always seemed like such a daunting task. In August 2007, I began what became the initial step in renovating my bathroom, and I started with the ceiling. Because this room is so small (the ceiling is probably 35 ft²) I thought I could knock this out quickly, and it went quite well at first.

I used a scraper to chip and peel, and had the occasional large section come down. But mostly it was quite tedious and messy, with only small pieces removed at a time. Plus it is tough to work overhead. Standing and balancing on a step ladder, you get very little leverage. Holding your arms over your head for any length of time is exhausting. This is just tough work, and it took several more hours than I expected.

The picture below shows the early stages of removal. The drywall beneath the texture was in good shape, and the builder had even covered and sanded the nails, which made for a nice, smooth surface.


And the finished product...


After all the texture was removed, I patched some areas with joint compound, sanded, primed, then painted the ceiling in a white semi-gloss. One of the advantages to the smooth finish is how light reflects much better than with the textured finish. In Europe, for example, they've painted ceilings for years with a high-gloss finish to better reflect light. This works quite well in my bathroom because the main source of lighting is a wall sconce that points upward. This fixture has a 200 watt halogen bulb and is extremely bright. The circuit is on a dimmer to save energy, but I can flood this small room with light if needed, which I did for the above photograph.

If and when I repeat this procedure for other rooms, I'm going to mist the ceiling with a spray bottle of water first. This is supposed to loosen the texture from the drywall and ease the process.